We previously looked at Selenium Webdriver's features and advantages, and how to integrate it with Jmeter. In this post we'll explore installation and configuation. Selenium Webdriver Scripts can be generated in various programming languages depending upon the Requirements and skills. Here, Java is used to generate the Webdriver scripts in Eclipse.
Steps to configure java with eclipse
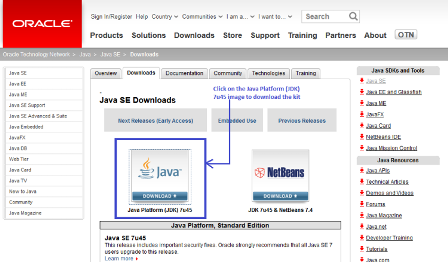
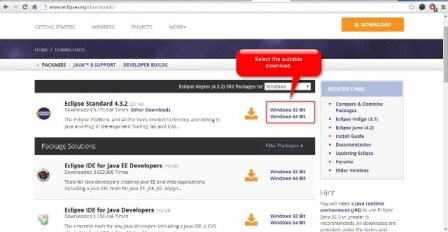
Step 2 - Download and install Eclipse
Step 3 - Download Selenium Java Client Driver
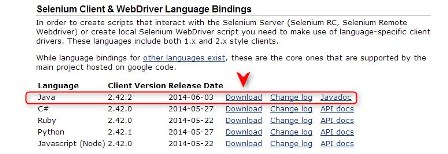
Select only Java Client driver and download. After downloading, unzip it and a folder contains two jar files related to Selenium, a lib folder which also contains jar files inside it. Beside this, there is a change log file as well. Refer to the screenshot below.
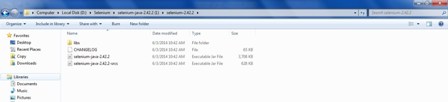
Step 4 - Download selenium-server-standalone-2.42.2 jar file.
Save this Selenium server file in the same folder as above that is, Selenium-2.42.2 folder.
Step 5 - Create a new Project in Eclipse.
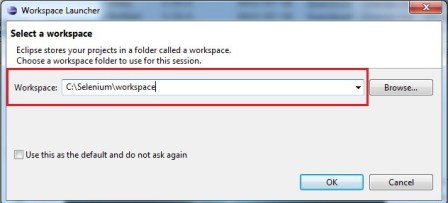
-Open Eclipse executable file and create a new workspace.
-Now in Eclipse, create a new project by clicking on File menu –> New –> Java Project ->
-Name the project as 'TestProject' and click finish.

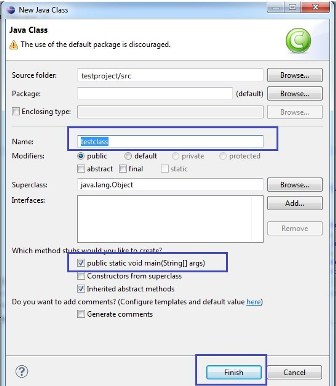
- Create a new Java class by clicking on File menu –> New -> Class then name it as 'TestClass' and select the checkbox for 'public static void main (String[] args) and click finish.
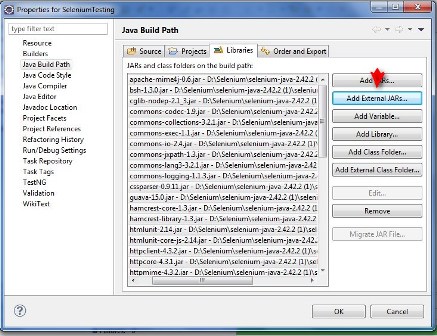
- Now Right-click on testproject and select Build Path -> Configure Build Path and click Add External Jars button for sidebar .
- Navigate to the location where Selenium 2.42.2 folder is saved and add Selenium-java-2.42.2, selenium-java-2.42.2-srcs, selenium-server-standalone-2.42.2 jar files and all the jar files in the libs folder and click ok button.
-Your Properties window after adding all the jar file should now look similar to the image below.
Step 5 - Run the Sample Program.
Lets run the sample program in Firefox driver. Firefox driver is included in the selenium-server-standalone jar file. The driver comes in the form of an xpi (firefox extension) which is added to the firefox profile when you start a new instance of FirefoxDriver.
Usage
WebDriver driver = new FirefoxDriver();
Sample code
package org.openqa.selenium.example;i
import org.openqa.selenium.By;
import org.openqa.selenium.WebDriver;
import org.openqa.selenium.WebElement;
import org.openqa.selenium.firefox.FirefoxDriver;
public class Example {
public static void main(String[] args) {
WebDriver driver = new FirefoxDriver();
System.out.println("Firefox is opened");
driver.get("http://www.google.com");
Sytem.out.println("Google is selected");
// Find the text input element by its name
WebElement element = driver.findElement(By.name("q"));
// Enter something to search
element.sendKeys("Cheese!");
//Now submit the form to get the result from the element

               element.submit();
// Check the title of the page
System.out.println("Page title is: " + driver.getTitle());
}
}
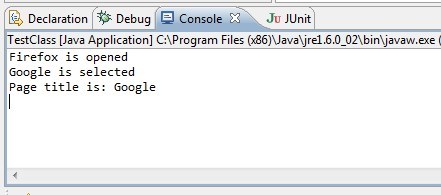
The above code should open Firefox browser and search for Cheese! keyword and display the results. And in Eclipse console window, the result should be displayed as below.
This successfully installs and run all the above things. Since Firefox is included in selenium server jar file itself, there wasn't any need to install Firefox driver but if there is a need to run the code in other browsers like Chrome, IE (IE 6 and above) and Safari, then the respective browser drivers need to be downloaded.
Internet Explorer Driver
The InternetExplorerDriver is a standalone server which implements WebDriver wire protocol. This driver has been tested with IE 6, 7, 8 and 9 on appropriate combinations of XP, Vista and Windows 7.
The driver supports running 32-bit and 64-bit versions of the browser. The choice of how to determine which "bit-ness" to use in launching the browser depends on which version of the IEDriverServer.exe is launched.
Download the 32-bit and 64-bit versions jar files and save it in the C drive.
Usage
WebDriver driver = new InternetExplorerDriver();
Required Configuration
- The IEDriverServer executable must be placed in your PATH.
Example: Path= C:\Program Files\ IEDriverServer_x64_2.42.0\IEDriverServer
- On IE 7 or higher on Windows Vista or Windows 7, you must set the Protected Mode settings for each zone to be the same value. The value can be on or off, as long as it is the same for every zone. To set the Protected Mode settings, choose "Internet Options." from the Tools menu, and click on the Security tab. For each zone, there will be a check box at the bottom of the tab labeled "Enable Protected Mode".
- The browser zoom level must be set to 100% so that the native mouse events can be set to the correct coordinates.
Sample code
import org.openqa.selenium.By;
import org.openqa.selenium.WebDriver;
import org.openqa.selenium.WebElement;
import org.openqa.selenium.ie.InternetExplorerDriver;
public class Example {
public static void main(String[] args) {
//System.setProperty("webdriver.ie.driver", "Path where it is saved");
System.setProperty("webdriver.ie.driver","C:\\Program Files\\Java\\IEDriverServer.exe");
System.out.println(System.getProperty("webdriver.ie.driver"));
WebDriver driver = new InternetExplorerDriver();
System.out.println("IE is selected");
driver.get("http://www.google.com");
System.out.println("Google is selected");
// Find the text input element by its name
WebElement element = driver.findElement(By.name("q"));
// Enter something to search
element.sendKeys("Cheese!");
// Now submit the form to get the result
element.submit();
// Check the title of the page
System.out.println("Page title is: " + driver.getTitle());
}
}
The above code should open IE browser and search for Cheese! keyword and display the results. IE is slow compared to other browsers, so have to wait patiently till it loads. And in Eclipse console window, the result should be displayed as below.

Chrome Driver
The ChromeDriver Developed in collaboration with the Chromium team, the ChromeDriver is a standalone server which implements WebDriver wire protocol.
The ChromeDriver consists of three separate pieces. There is the browser itself ("chrome"), the language bindings provided by the Selenium project ("the driver") and an executable downloaded from the Chromium project which acts as a bridge between "chrome" and the "driver". This executable is called "ChromeDriver".
Required Configuration
- To get set up, first download the appropriate server. Make sure the server can be located on your PATH
Example: Path= C:\Program Files\chromedriver_win_23.0.1240.0\chromedriver.exe
Usage
WebDriver driver = new ChromeDriver();
Sample code:
package org.openqa.selenium.example;
import org.openqa.selenium.By;
import org.openqa.selenium.WebDriver;
import org.openqa.selenium.WebElement;
import org.openqa.selenium.chrome.ChromeDriver;
public class Example {
public static void main(String[] args) {
//chrome
System.setProperty("webdriver.chrome.driver", "C:\\Program Files\\Java\\chromedriver.exe");
System.out.println(System.getProperty("webdriver.chrome.driver"));
WebDriver driver = new ChromeDriver();
System.out.println("Chrome is selected");
driver.get("http://www.google.com");
System.out.println("Google is selected");
// Find the text input element by its name
WebElement element = driver.findElement(By.name("q"));
// Enter any key to search
element.sendKeys("Cheese!");
// Submit the form to get the result
element.submit();
// Check the title of the page
System.out.println("Page title is: " + driver.getTitle());
}
}
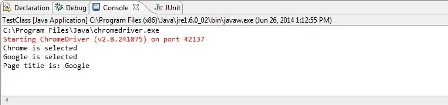
The above code should open Chrome browser and search for Cheese! keyword and display the results. And in Eclipse console window, the result should be displayed as below.
Apart from these browsers, Web Applications can also be automated in other browsers, and their drivers can be downloaded from http://docs.seleniumhq.org/download/ under Third Party Browser Drivers section.